


Whipped Shea Butter: The Complete Guide to Rich, Natural Moisture for Skin & Hair
If you have ever struggled to spread a dense block of shea across ashy elbows or coily hair ends, you already know why whipped shea butter exists. This guide walks you through everything you need to know-from the science behind its moisturizing power, to step-by-step DIY methods (hot and cold process), to practical tips for texture, storage, and daily use on every skin type.
Key Takeaways
Whipped shea butter is a rich moisturizer made by aerating raw unrefined shea butter with nourishing oils-like coconut oil, jojoba oil, and other butters-to create a soft, cloud-like texture that deeply benefits dry skin and textured hair. The whipped process creates a light, fluffy texture that spreads easily and absorbs faster into the skin compared to regular shea butter, while retaining all the properties of the raw ingredient.
-
Deep moisture and barrier repair. Shea butter is rich in fatty acids and vitamins A and E, promoting deep moisture, reducing transepidermal water loss, and supporting skin that looks plumper and more even-toned.
-
Best for dry, sensitive, and melanin-rich skin; curly and coily hair. Whipped shea butter is suitable for sensitive skin types and long-standing routines for ashiness, protective styling, and stretch-prone areas.
-
Water-free and concentrated. Unlike lotions, whipped body butter contains no water and needs no conventional preservatives-so a smaller amount goes further, and every gram is active moisture.
-
Whipped shea vs. regular body butters and lotions. Regular body butters are dense and poured; lotions are water-oil emulsions that absorb fast but may need reapplication. Whipped shea butter sits in between-airy, concentrated, and long-lasting with a richer feel.
-
This blog post covers both DIY recipes (hot and cold process) and how to choose high-quality, cruelty-free whipped shea butter from clean beauty makers for everyday routines.
What Is Whipped Shea Butter?
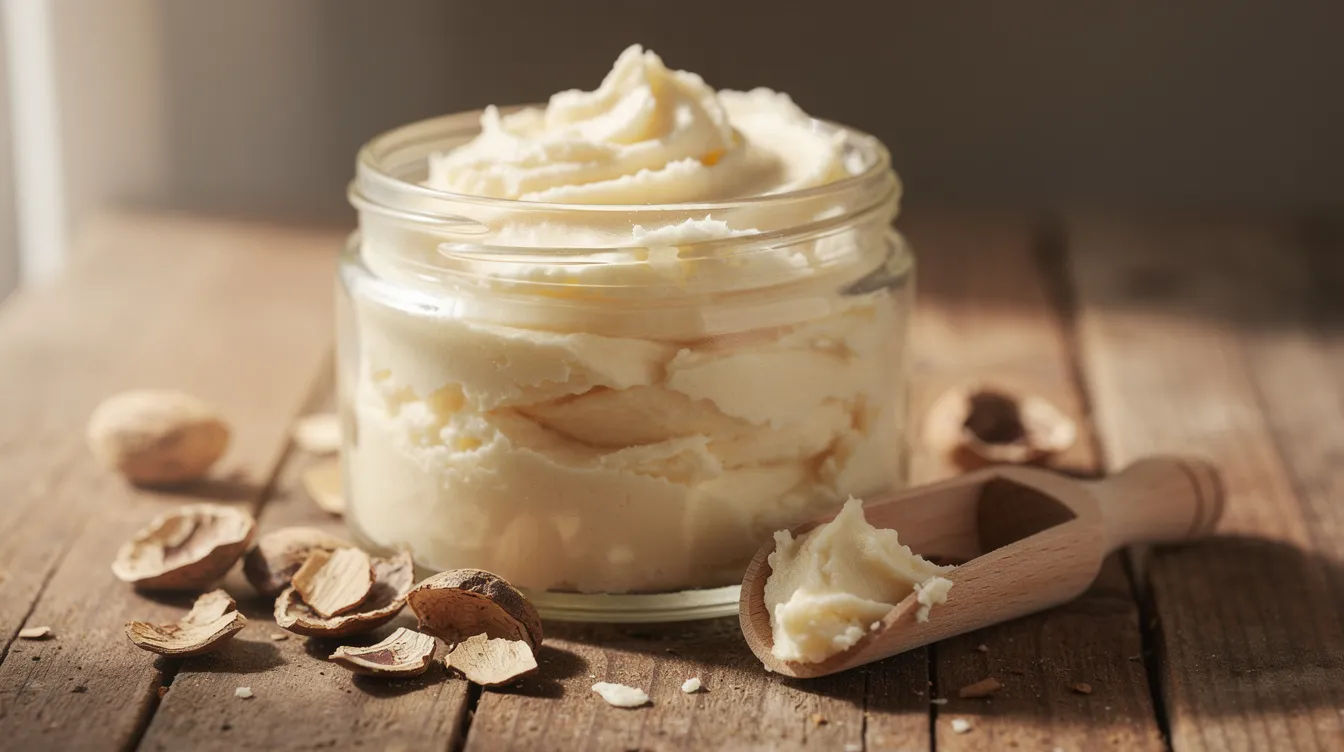
Whipped shea butter is raw unrefined shea butter that has been mechanically whipped-usually with plant-based carrier oils-into a fluffy, spreadable body butter, without adding water. Regular shea butter is dense and requires warming for application; whipped shea butter is creamy and easy to spread right out of the jar.
The whipping process incorporates tiny air bubbles into the fat matrix, transforming a dense, sometimes grainy block into a lighter, mousse-like texture that melts on contact with skin. Whipped shea butter retains the properties of raw shea butter while being far easier to use, scoop, and distribute evenly.
This category includes pure shea-based whips as well as blends with coconut oil, cocoa butter, mango butter, and other butters. Whipped shea butter is often blended with nourishing carrier oils to enhance benefits-think sweet almond oil for faster absorption, or jojoba oil for a silkier feel. You can use it on body, hands, feet, and many types of textured hair: twist-outs, braid-outs, scalp treatments, and sealing dry ends. It can also be used for massage and skin hydration, making it a versatile staple for anyone who values clean, plant-based body products.
Why Shea Butter Works So Well for Dry Skin
Shea butter (listed on labels as ingredients butyrospermum parkii) is rich in fatty acids-primarily oleic acid (~40–65%) and stearic acid (~22–50%)-as well as naturally occurring compounds like plant sterols, triterpenes, and tocopherols that actively support the skin barrier. According to analyses of shea trees across Côte d'Ivoire, oleic and stearic acids together can represent roughly 85–90% of the total fatty acid content, making shea one of the most barrier-friendly natural fats available.
Here is why that composition matters for dry skin:
-
Seals in moisture. The high proportion of long-chain saturated fats creates a semi-occlusive layer, reducing transepidermal water loss so skin stays hydrated longer between applications.
-
Softens rough patches. Oleic and linoleic acids improve suppleness on chronically dry zones-elbows, knees, heels-where skin tends to crack or flake.
-
Supports repair. The unsaponifiable fraction (1–19% in quality batters) provides anti inflammatory benefits, helping conditions like eczema, itchiness, and wind-damaged skin.
-
Vitamin content. Shea butter is rich in fatty acids and vitamins A and E, promoting deep moisture and helping skin look plumper over time.
For people with very dry skin or those living in dry, cold climates, shea-based body butters provide a more long-lasting protective layer than typical water-based lotions. Whipped shea butter offers intense hydration and nourishment for hair and skin without requiring frequent reapplication.
Whipped textures are especially helpful for people who find raw blocks of shea too hard, grainy, or difficult to spread-particularly in cooler ambient temperature conditions where the fat is at its firmest.
Raw Unrefined vs. Refined Shea Butter
The choice between raw unrefined shea butter and refined shea butter directly affects the color, scent, and nutrient density of the final product-and therefore the character of your whipped butter.
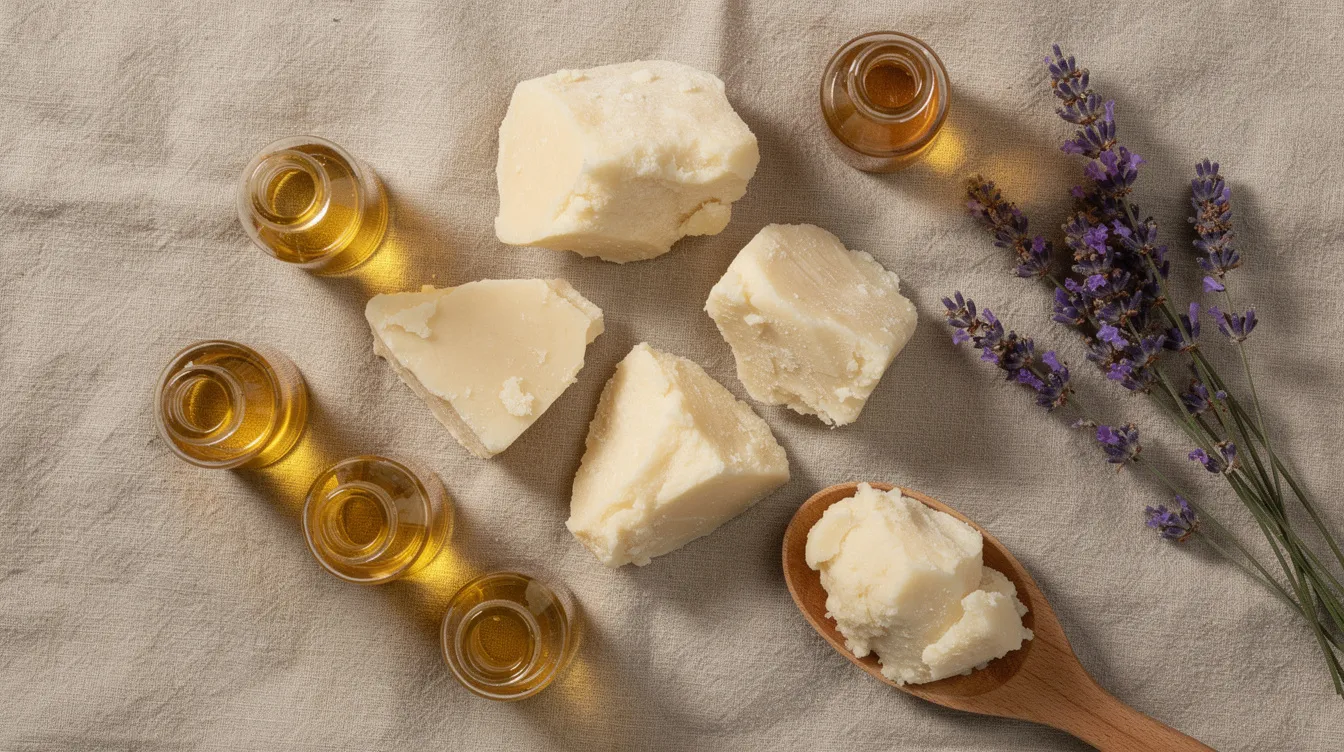
Raw unrefined shea butter ranges from beige to pale gold in color and carries a natural nutty aroma that many people associate with traditional African skincare. Unrefined shea butter has a natural nutty aroma that serves as a pleasant baseline scent, even before you add essential oils. It undergoes minimal processing-filtered and cleaned but not bleached or deodorized-and retains higher levels of unsaponifiable compounds (sterols, triterpenes, phenolics) that contribute to its anti-inflammatory and antioxidant activity. Research comparing crude unrefined butter to refined stearin fractions found that refining significantly reduces phenolics, flavonoids, and antioxidant capacity. If you want to start with a high-quality solid raw shea, look for ivory-to-gold color and a clean, nutty scent.
Refined shea butter is pure white or off white, has a very mild-almost neutral-scent, and offers a smoother, more uniform consistency. It works well for people extremely sensitive to natural aromas or for formulas where you plan to add essential oils and want a blank scent canvas. Refined shea also provides more batch-to-batch consistency, which matters for makers producing large runs.
When to use which:
|
Feature |
Unrefined |
Refined |
|---|---|---|
|
Color |
Ivory to pale gold |
Pure white to off white |
|
Scent |
Nutty, earthy |
Neutral |
|
Bioactives |
Higher |
Lower |
|
Best for |
Body butters, hair sealing, clean beauty routines |
Facial use, complex fragrance blends, oily/sensitive skin |
Many DIY makers and natural-leaning brands choose unrefined shea to keep as much of the original plant profile as possible while ensuring it is filtered and clean for external use.
Core Ingredients in Whipped Shea Butter
This section covers the common building blocks of whipped shea butter and how each contributes to texture, skin feel, and final product quality.
Shea butter as the foundation. Shea butter typically makes up roughly 30–70% of a whipped formula. Higher shea content yields firmer butters with greater barrier and sealant effect; lower shea with more oils yields a lighter consistency but potentially less long-term occlusion. Always weigh solid ingredients before melting for whipped body butter, because volumetric measurements are unreliable with fats that change density as they warm.
Supportive oils. Carrier oils adjust hardness, spreadability, and absorption rate. Common choices include 100% pure botanical carrier oils:
-
Lightweight: grapeseed carrier oil, sunflower, apricot oil
-
Medium weight: jojoba carrier oil, sweet almond oil
-
Richer: olive oil, avocado oil, coconut carrier oil (solid below ~24°C, liquid oil above)
Each liquid oil shifts the final texture. More lightweight oils = faster absorption, less greasy feel. More rich oils = longer-lasting occlusion, heavier feel.
Other butters. Cocoa butter (also called cacao butter) adds firmness and raises the melting point-useful for hot weather formulas. Mango butter contributes a lighter, creamier slip. Changing butters changes the melt profile and skin feel of the final product, and pairing them with sunflower carrier oil can further lighten the texture.
Optional add-ins:
-
Vitamin E (mixed tocopherols) as an antioxidant to slow oxidation of unsaturated fatty acids and extend shelf life.
-
Essential oils for scent, used sparingly-typically 0.5–2% of the total formula.
-
Starches like arrowroot powder or tapioca starch to reduce surface greasiness and add a silky, powdery finish.
Comparing Shea Butter with Other Butters (Cocoa, Mango & More)
Formulators often blend multiple plant butters to fine-tune the texture, scent, and melt profile of body butters. No single butter does everything perfectly, so understanding how they interact helps you build a better whip.
Cocoa butter is a hard butter with a higher melting point (~34°C) and a subtle chocolate-like aroma. It creates excellent structure in bar-style products or very firm whipped textures, but can feel heavier if used in high amounts. Think of it as the scaffolding that keeps your whipped shea from collapsing in warm rooms.
Mango butter is a soft butter with a lighter feel than shea, an off-white color, and almost no scent. It is popular for those wanting a less greasy finish while still deeply moisturizing dry skin. Mango-heavy blends work well as a daily moisturizer for people who dislike residue.
Other specialty butters-kokum, cupuacu, murumuru-are a bit harder to source but can further tweak firmness and absorption. They generally require re-balancing with oils to keep the final product scoopable.
When to choose what:
|
Goal |
Recommended Blend |
|---|---|
|
Very dry, compromised skin |
Mostly shea, small amount of liquid oil |
|
Hot weather, combination skin |
Shea + mango butter, lightweight oil |
|
Extra staying power in cold/windy weather |
Shea + cocoa butter, medium-weight oil |
If your body butter starts feeling too heavy for the season, you can always add more shea butter or swap in a lighter oil to recalibrate. The flexibility of blending is one of the biggest advantages of making your own shea butter formulas.
Whipped Shea Butter vs. Lotions and Regular Body Butters
Whipped shea butter, classic body butters, and lotions all moisturize, but their structure and feel are very different. Understanding the difference helps you choose the right product for each situation.
Lotions are water-and-oil emulsions. They feel lighter, sink in faster, and often require conventional preservatives to prevent microbial growth. The tradeoff: they may need reapplication several times a day, especially in harsh weather or on very dry skin.
Classic (non-whipped) body butters are dense, often poured into jars and left to set. They deliver heavy-duty moisture but can feel thick and difficult to spread-almost like working with a candle if the room is cool. Whipped versions simply introduce air for a softer, mousse-like consistency without changing core ingredients.
Whipped shea butter is anhydrous (no water), very concentrated, and best applied to slightly damp skin so that it can lock in moisture effectively. Because there is no water to evaporate, every gram of whipped butter is active fat working to protect your skin. Whipped shea butter absorbs faster into the skin compared to regular shea butter, largely because the aerated texture distributes thinner, more even layers.
A practical approach: use a lotion for quick morning hydration and a whipped body butter at night after your shower-or save the whipped shea for harsh-weather days when your skin needs serious protection.
For anyone exploring lightweight options for daily hydration, layering a hydrating mist under a thin seal of whipped butter gives the best of both worlds.
Benefits of Whipped Shea Butter for Different Skin Types
Although whipped shea butter is best known for dry skin, it can be adapted for many skin types by adjusting oils and frequency of use.
Very dry skin or mature skin. This is where whipped shea truly shines. It helps to improve skin elasticity and softness, reduces flakiness, supports tight or itchy patches, and provides lasting relief on areas like hands, décolletage, and shins that tend to age visibly. Whipped shea butter deeply nourishes the skin without the need for frequent reapplication.
Normal or combination skin. Use smaller amounts, focusing on rough zones-heels, elbows, cuticles-or try lighter, mango-heavy blends on the full body. You don't need to slather on thick layers; a pea-sized amount per limb is often enough.
Sensitive skin. Whipped shea butter is suitable for sensitive skin types, but the key is keeping formulas simple: shea plus one or two mild oils, no fragrance. Always patch test new batches, and avoid strong essential oil blends. Whipped shea butter provides anti-inflammatory benefits, helping conditions like eczema and contact dermatitis where the barrier is compromised.
Melanin-rich skin and textured hair communities. Shea-based body butters have been part of long-standing routines across the african continent for ashiness, stretch marks, stretch-prone areas, and protective styling. For skin that tends to look dull or ashy without adequate moisture, the slight natural pigmentation of unrefined shea (that golden tone) works beautifully-your skin loves the fatty acid profile and the glow it creates.
How Whipped Shea Butter Supports Textured and Curly Hair
Many people with curly, coily, and kinky hair use whipped shea butter as part of LOC (Liquid-Oil-Cream) or LCO routines, or for twist-outs and braid-outs. Whipped shea butter can be used for hair moisture and scalp care, making it far more than a body-only product.
A small amount of whipped butter can seal moisture into hair strands, especially at the ends, helping reduce breakage and single-strand knots. If you struggle with dry, splitting ends, pairing whipped shea with the right oils for hair ends can make a noticeable difference in retention over a few weeks.
Typical hair uses:
-
Scrunching a pea-sized amount into damp curls after washing
-
Smoothing over braids, locs, or freshly twisted sections
-
Massaging into a dry scalp sparingly-avoid overloading, which can cause buildup
Pair whipped shea butter with lighter leave-in conditioners and clean botanical oils (like sweet almond carrier oil or grapeseed) for balance, rather than relying on thick butter alone. If you are working on overall hair hydration, a water-based step before the butter is essential.
Fine or low-porosity hair may prefer very small amounts-or a more oil-heavy, less-butter-heavy whip-to prevent a weighed-down, greasy feel. Start with less than you think you need and build up.
Choosing the Right Oils to Blend with Shea Butter
The carrier oils you whip into shea largely determine whether the final product feels light, silky, or heavy and occlusive. Choosing wisely makes the difference between a body butter you reach for daily and one that sits untouched.
Oil "families" by weight:
|
Category |
Examples |
Best for |
|---|---|---|
|
Lightweight |
Grapeseed, sunflower, apricot oil |
Hot weather, oily-prone areas, fast absorption |
|
Medium weight |
Jojoba oil, sweet almond oil, argan oil |
Year-round use, balanced feel |
|
Richer |
Olive oil, avocado oil, coconut oil |
Winter, very dry skin, heavier occlusion |
Choose oils based on climate and skin type. Lightweight oils for hot weather or areas where you don't want residue; richer ones for winter or very dry limbs. Some people also explore batana oil for skin or rice bran carrier oil as occasional additions for extra nourishment.
Keep in mind that coconut oil is solid below approximately 24°C and becomes a liquid oil above that threshold. Including shea butter coconut oil blends in a formula requires awareness of your local temperatures to avoid unexpected melting or hardening throughout the day.
When starting out, keep blends simple-shea plus one or two oils. This way you can easily adjust future batches. If the first round feels too heavy, swap in a lighter oil next time. If it absorbs too quickly, add a bit more shea butter or a richer oil. A general starting point: use a 35/65 shea butter to oil ratio at 19°C (66°F), then adjust based on how it feels on your skin and the ambient temperature in your home.
The Role of Essential Oils, Fragrance, and Unscented Options
Many people love scented whipped body butters, but sensitive skin often does best with very low or no fragrance. The good news is that whipped shea butter can easily blend in essential oils, enhancing its scent without complicated formulation-just a few drops stirred in at the end of whipping.
Essential oils are natural aromatic options, but they must be used at low rates-typically 0.5–2% of the total formula. Strong dilution is critical. Known sensitizers (cinnamon bark, clove, undiluted citrus) should be avoided on compromised or reactive skin. Even botanical scents can irritate, so patch testing is important, and fragrance-free or naturally nutty-scented shea is a safe default for daily use.
Popular gentle essential oils for body butter include:
-
Lavender - calming, widely tolerated, especially when blended into a base like witch hazel carrier oil
-
Sweet orange - uplifting, light citrus note
-
Tea tree - antimicrobial, best for scalp-focused blends
When you add essential oils, do so only after the main whipping is complete, folding them gently into the finished peaks. Never use essential oils on infants without professional guidance, and always keep concentrations minimal for children.
Many clean beauty makers now offer multiple fragrance levels-unscented, lightly scented, and bolder blends-so customers can choose what their skin tolerates best. If you have never used a scented butter before, start unscented and work up.
Hot Process vs. Cold Process Whipped Shea Butter
"Hot process" means fully or partially melting shea and oils before cooling and whipping. "Cold process" means whipping soft butters at room temperature without melting them first. Both produce excellent whipped shea, but they suit different formulas and situations.
Hot process advantages:
-
Smoother, more uniform texture
-
Easier incorporation of hard butter like cocoa butter or waxes
-
Better control over graininess (the grainy crystals that form when shea cools unevenly)
Cold process advantages:
-
Faster overall-cold-whipped shea butter takes about one hour to prepare from start to finish
-
Uses less energy, no stove or double boiler required
-
Ideal for soft butters like raw unrefined shea butter or mango butter
-
Reduces risk of overheating delicate bioactive components
The main risk with hot process is cooling too slowly, which causes coarse, grainy crystals to form in the fat. Alternating short freezer stints with whipping sessions helps create a stable, fluffy end product.
Use hot process for complex formulas with harder butters (cocoa, kokum). Use cold process for simpler shea-centric whips and small, quick batches where you want to preserve every bit of the raw vitamin content.
Step-by-Step: Basic Hot-Process Whipped Shea Butter Method
This is a concrete, kitchen-friendly outline for a classic melt-cool-whip method, suitable for a beginner's first small batch.
What you will need:
-
Raw or unrefined shea butter (about 60–70% of your batch weight)
-
A liquid oil of your choice (jojoba, sweet almond, or grapeseed work well)
-
Optional: cocoa butter or mango butter (10–15%)
-
Optional: vitamin E, essential oils, arrowroot powder
-
Double boiler or heat-safe bowl over a pot of water
-
Hand mixer or stand mixer
-
Mixing bowl, spatula, clean jars
Steps:
-
Weigh ingredients accurately. Weigh solid ingredients before melting for whipped body butter-this ensures consistency between batches and avoids guesswork. Cut shea into small chunks for faster, more even melting.
-
Melt gently. Place shea butter (and any hard butter like cacao butter) in a double boiler over low heat. Stir occasionally until fully liquid. Remove from heat immediately-do not overheat.
-
Stir in liquid oils. Add your chosen liquid oil and vitamin E while the mixture is still warm, stirring to combine.
-
Cool the mixture. Transfer to a mixing bowl and let it cool. You can speed this up by placing the bowl in the refrigerator for 15–20 minutes. The goal: a thick, opaque, pudding-like consistency-not fully solid, not still liquid.
-
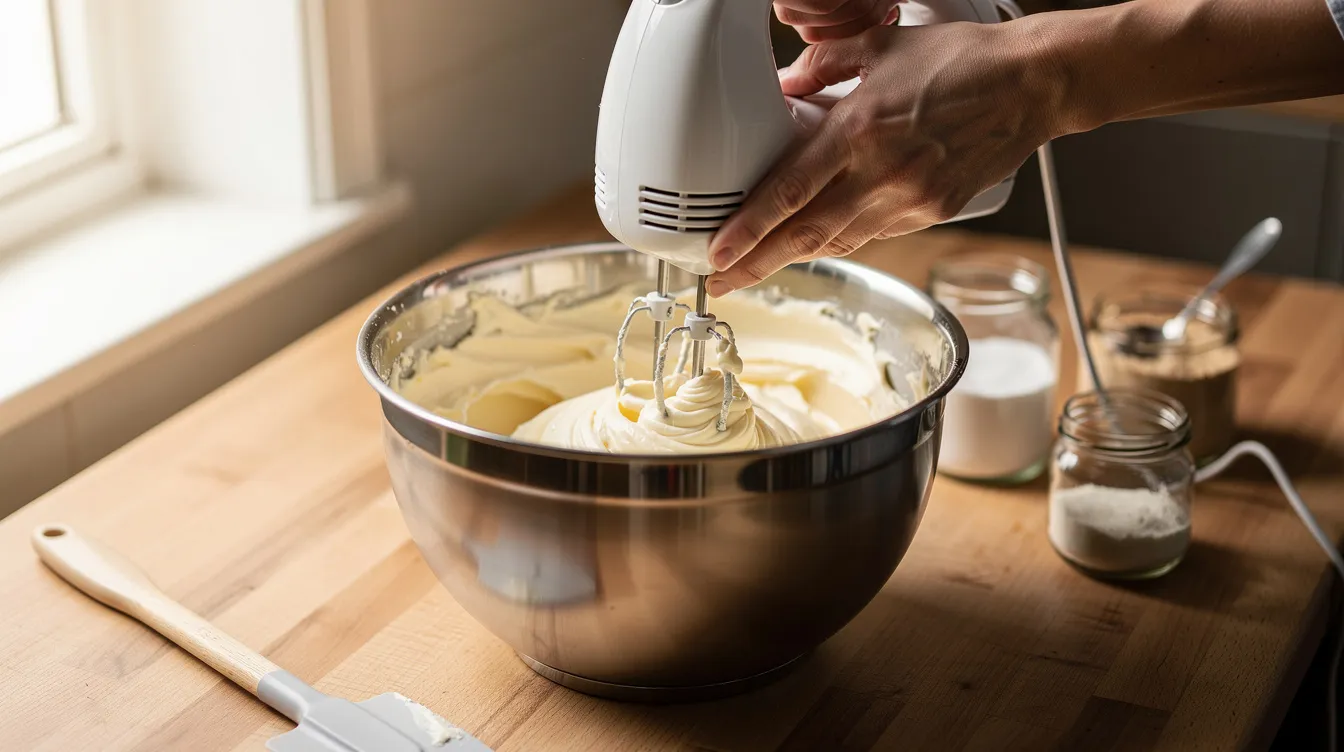
Whip. Using a hand mixer or stand mixer, beat the cooled mixture on medium-high speed. Scrape down the sides of the bowl periodically. The butter should turn paler and fluffier over 5–10 minutes, looking similar to whipped cream in texture.
-
Cycle if needed. If the mixture starts to feel warm or looks greasy, pause and chill for 5–10 minutes, then whip again. Repeat until you have stable, fluffy peaks.
-
Add extras. Fold in essential oils or arrowroot powder at the very end, mixing gently to distribute without deflating.
-
Jar and rest. Transfer to clean jars, label with the date and batch size, and let the butter rest overnight at room temperature. The trapped air and texture will stabilize by morning.
Step-by-Step: Basic Cold-Process (No-Melt) Whipped Shea Butter Method
This method works best with soft, scoopable butters-unrefined shea, mango-and avoids the long melt-cool cycle, making it ideal for small batches and quick projects. Cold-whipped shea butter takes about 1 hour to prepare from start to jar.
Steps:
-
Prep the shea. Cut your shea into small chunks and let them come fully to room temperature. If your shea is very hard (a bit harder than you would like), leave it out for an hour or two until it softens enough to dent with a thumb.
-
Beat the shea alone. Place the chunks in a mixing bowl and beat with a hand mixer or stand mixer on medium speed until the texture resembles whipped cream cheese-smooth, pale, and starting to lighten in color. This usually takes 3–5 minutes.
-
Drizzle in oils. Gradually add your chosen liquid oil while whipping on low speed. Pour slowly, as adding too much oil at once can cause the mixture to collapse into a dense balm instead of staying fluffy.
-
Incorporate extras. Once the main body has reached stable peaks, fold in vitamin E, arrowroot powder, or a few drops of essential oils. Mix gently-over-whipping at this stage generates heat and can soften the butter.
-
Rescue if too soft. If the mixture becomes too soft or won't hold peaks, a short fridge or freezer rest (10–15 minutes) followed by one more whipping session usually restores volume and texture. For a 50g batch, you may need to add 2–5g more shea butter if the whip is still too soft after chilling.
-
Jar and label. Scoop into clean containers, press out air pockets, and label with date and ingredients.
Cold process is the simplest path to making your own shea butter whip at home. If you are a first-timer, start here before attempting complex hot-process formulas.
Managing Texture in Hot Weather and Humid Climates
Whipped shea butter behaves differently in July heat than it does in a cool, air-conditioned room. Because it is made entirely of fats with a melting point around 35–40°C, whipped shea butter is sensitive to temperature fluctuations. In practice, whipped shea butter can liquify above 23°C (73°F), especially formulas with high proportions of liquid oils or soft butters.
Hot weather can cause whipped butters to deflate or liquify, losing their airy structure entirely. Repeated melt-solidify cycles affect long-term texture, often leaving a grainy, less pleasant feel when the butter resolidifies without being re-whipped.
Formulation strategies for warm climates:
-
Slightly increase the proportion of harder butters (cocoa butter, or higher-stearic shea from west africa origins)
-
Decrease the amount of liquid oil in the formula
-
Consider adding a small percentage of corn starch or tapioca starch to absorb surface oil
Storage tips for hot weather regions:
-
Keep your daily-use jar in the coolest spot in the house-a bedroom drawer or linen closet away from windows
-
Store larger backup jars in the refrigerator during peak summer months
-
Never leave jars in hot cars, steamy bathrooms, or near heating vents
Temporary melting does not necessarily ruin safety or moisturizing performance. If your whipped butter melts, you can still use it as a balm-the oils and fatty acids remain fully effective. If you want to restore the fluffy texture, simply chill and re whip with a mixer.
Adjusting Consistency: When Your Whipped Shea Butter Is Too Soft or Too Hard
Because every home and climate is different, it is completely normal to tweak ratios after the first batch to reach a "just right" consistency.
Too soft: your butter won't hold peaks, looks like thick oil or runny pudding.
-
Add more shea butter or another soft butter in small increments (5–10% at a time)
-
Re-melt the batch gently, chill, and re-whip
-
If you are working with a 50g batch, adding just 2–5g more shea butter can make a meaningful difference
-
Reduce the proportion of liquid oil in your next batch
Too hard: the product is crumbly, difficult to scoop, or doesn't melt easily on contact with skin.
-
Add a little more liquid oil (start with a teaspoon per 100g of product) and re-whip
-
Slightly warm the mixture with your hands or a brief 10-second microwave pulse before whipping
-
Consider swapping part of the shea for a softer butter like mango
-
If you recommend substituting one oil for another, test it in a small portion first
Keep simple notes on batch dates, room temperature, and ratios so you can dial in a reliable formula over time. Minor texture imperfections don't negate the moisturizing benefits-the main goal is a consistency you will actually enjoy using regularly.
Reducing Greasiness and Improving Skin Feel
Pure oil-and-butter products are inherently richer than lotions, but there are practical ways to make them feel lighter and more elegant on skin.
Use lightweight carrier oils. Oils like grapeseed or sunflower help whipped shea butter absorb faster compared to heavier oils or very high shea percentages. If your current formula feels like it sits on top of the skin, swap in a lighter oil for part of your blend.
Add starches or clays. Small amounts (1–3% of total formula) of arrowroot powder, tapioca starch, or kaolin clay reduce surface gloss and "slip," giving a more powdery or satin finish. Many people prefer this in hot weather or when they need to dress immediately after application.
Application tips to reduce greasy feeling:
-
Apply to damp skin right after showering-the water on your skin helps the butter emulsify and absorb
-
Start with pea-sized amounts per limb and build up only as needed
-
Allow two to three minutes before dressing so the butter can absorb fully
-
Focus on heels, elbows, and shins where skin is thickest and least oil-prone
Using whipped butters mainly at night-or targeting them to rough spots-is another strategy for those who dislike any daytime residue. Your lotion handles the morning, and the whipped butter does the heavy lifting overnight. Whipped shea butter deeply nourishes the skin during these longer, undisturbed application windows.
Safe Use, Patch Testing, and Shelf Life
Even natural, plant-based beauty products can cause irritation for some people. Simple safety steps protect your skin and help you get the most out of every jar.
Patch testing. Apply a small amount of the whipped butter to the inner forearm. Wait 24 hours and watch for redness, itching, or burning before using the product more widely. This is especially important when trying a new batch with different oils or essential oils.
Preservatives and oxidation. Anhydrous body butters do not require traditional water-based preservatives, but they can still oxidize over time. Vitamin E helps slow this process and can be combined with stable bases like mineral carrier oil in other formulas. Always use clean, dry hands or a spatula to scoop product-introducing water or damp fingers can invite microbial growth even in an oil-based formula.
Shelf life. Whipped shea butter can last at least one year if stored properly-in a cool place, away from direct sunlight, in a tightly sealed container. Realistically, a fresh batch using quality oils and vitamin E will maintain good performance for 6–12 months. Factors that shorten shelf life include using already-oxidized oils, storing in heat, or repeatedly introducing water.
Whipped shea butter has a longer shelf life than water-based lotions because there is no aqueous phase to support microbial growth, but oxidation is the primary concern.
Spoilage signs to watch for:
-
A sharp, crayon-like, or sour smell (different from shea's natural nutty aroma)
-
Noticeable darkening or blotchy discoloration
-
Unusual sticky or tacky surface feel that doesn't correlate with temperature shifts
If any of these appear, discard the product and make a fresh batch in small batches to avoid waste.
How to Incorporate Whipped Shea Butter into a Daily Routine
Consistency matters more than complexity. Whipped shea butter fits naturally into simple morning and evening rituals without requiring a complete overhaul of your routine.
Body routine:
-
After a lukewarm shower, pat skin until slightly damp-not bone dry
-
Scoop a small amount of whipped shea butter and warm it between your palms
-
Apply to the driest areas first: legs, elbows, ankles, hands
-
Adjust quantity by season-less in summer, more in winter or if indoor heating is running
Hair routine:
-
After washing and conditioning, apply a tiny amount to ends while hair is still damp
-
Use to seal in moisture for braid-outs, twist-outs, or locs once or twice per week
-
Pair with a lighter leave-in or a natural hair oil treatment for balanced layering
Special uses:
-
Overnight foot treatment: apply a thick layer, pull on cotton socks, and wake up with softer heels
-
Hand treatment after frequent washing or sanitizing
-
Protective layer before exposure to winter wind, indoor heating, or dry airplane cabin air
-
It can be used for massage and skin hydration-warm a generous amount between palms and work into tired muscles
Pair whipped butters with gentle, low-stripping cleansers so you are not constantly removing the protective layer you just applied. Whipped shea butter works as a daily moisturizer when used in appropriate amounts for your skin type.
Tips for Making Whipped Shea Butter in Larger Batches
Once you love a formula, you will likely want to scale up for family use, gifting, or even small-batch selling. But larger volumes behave differently than a 50–100g test batch.
Equipment upgrades. Move from a hand mixer to a stand mixer for large batches-the motor handles bigger volumes without overheating. Use sturdy heat-safe bowls and larger double boilers or water baths to melt butters evenly. A big batch of whipped butter needs sustained whipping power, especially if you are working with multiple natural carrier oils and butters at once.
Cooling challenges. Large volumes cool more slowly, increasing the risk of grainy crystal formation. To counter this:
-
Divide the melted mixture into smaller containers for alternating chilling and whipping cycles
-
Stir frequently during the cooling window to distribute temperature evenly
-
Don't try to whip a full 500g+ batch all at once-process in stages
Labeling and hygiene. Maintain strict labeling: batch numbers, dates, exact ratios, and batch size. Use sanitized jars, clean spatulas, and avoid cross-contamination between batches. These habits matter even more when sharing or selling products.
Expect minor adjustments. Oil-to-butter ratios that work perfectly at 100g may need a small tweak at 500g because ambient temperature, bowl size, and cooling time all change at scale. Test a small portion of any new formula before committing the entire batch.
Ethical Sourcing and Clean Beauty Considerations
The shea nut grows across a wide belt of the african continent, primarily in west africa-countries like Burkina Faso, Ghana, and Mali-where women-led cooperatives have harvested and processed shea for generations. Ethically sourced shea supports these communities economically and helps ensure sustainable harvesting practices.
When purchasing whipped body butters or raw materials, look for:
-
Mentions of fair trade sourcing and transparency about origin regions
-
Cruelty-free commitments and no animal testing
-
Minimal, plant-based ingredient lists-no unnecessary synthetic fillers, heavy silicones, or long lists of potential irritants
Many clean beauty makers source fair trade ingredients from west africa for their whipped shea butter formulas, ensuring that the communities doing the labor are fairly compensated.
Packaging matters too. Lightweight containers, recyclable materials, and reduced outer packaging align with a holistic, eco-conscious approach. If you enjoy DIY, honor your ingredients by buying from reputable raw-material suppliers that share information on harvest seasons, storage, and community impact.
Clean beauty is not just about what goes on your skin-it is about the full chain from tree to jar.
Storing Whipped Shea Butter for Best Quality
Good storage preserves both texture and aroma, especially because natural oils can oxidize and whipped textures are temperature sensitive.
Ideal storage conditions:
-
Keep jars in a cool, dry spot-away from direct sunlight and heat sources like radiators, stovetops, or sun-facing windowsills
-
Store in a cool place with consistent temperature; avoid rooms that swing between hot and cold
-
Use opaque or amber jars with tight lids to minimize light and air exposure
Seasonal adjustments:
-
In summer, move jars to a cooler room or refrigerator if your home regularly exceeds 25°C
-
In winter, avoid placing jars near heating vents or drafty windows that could cause condensation
-
Never leave jars in a parked car-interior temperatures can spike well past the melting point of any natural butter
Daily use vs. backup jars. Keep one small jar in your daily rotation and store larger backup jars unopened until needed. This staggers freshness across the year so you always have a quality product on hand. Always close lids fully after each use to reduce air exposure and slow oxidation.
Looking for an Easy, Ready-to-Use Whipped Shea Butter?
While making your own whipped shea butter can be rewarding, a well-formulated product can save time and deliver consistent texture and performance.
AKWAABA Whipped Shea Butter is crafted with rich, nourishing butters and carefully selected plant oils to create a smooth, lightweight texture that melts easily into the skin and hair.
- Deep, long-lasting moisture for dry skin
- Lightweight whipped texture for easy application
- Suitable for body, hands, feet, and hair
- Helps improve softness, smoothness, and overall skin feel
Whether you're targeting dry skin, protective styles, or daily hydration, a ready-made whipped shea butter can simplify your routine.

FAQs
Can I travel with whipped shea butter without it melting?
Travel with whipped shea butter is absolutely possible, but be prepared for texture changes. In hot weather, airplanes, or sun-heated luggage, the butter may soften or fully liquify. Pack it in a small, leak-proof jar and store it in your carry-on rather than checked luggage, which often sits on hot tarmacs. At your destination, keep it in the coolest spot available-a hotel mini-fridge works well in tropical climates.
If the butter melts and then resolidifies, the texture will likely change-less fluffy, more balm-like. This does not make it unsafe. As long as it doesn't smell rancid or show signs of contamination, you can continue to use it as a body balm. If you want to restore the whipped texture, chill it and re whip with a fork or small mixer once you are settled.
Is whipped shea butter safe for children's skin?
Simple, unscented formulas made from shea butter and mild plant oils are commonly used on children's dry skin-particularly on areas like cheeks, hands, and legs that get chapped in cold weather. The key is avoiding strong essential oils, mentholated scents, or hot spices in any product applied to kids.
Always patch test on a small area of the child's inner arm first. For infants-especially those with eczema, allergies, or other diagnosed skin conditions-consult a healthcare professional before applying any new topical product. When in doubt, keep the formula as simple as possible: shea, a drop of vitamin E, and nothing else.
Can I mix whipped shea butter with my existing lotions or serums?
It is better to layer than to physically mix. Apply a water-based serum or lotion first, let it absorb for a minute, and then seal it in with a thin layer of whipped shea butter on top. This gives you the benefits of both products without compromising either one.
Stirring water-based lotions directly into a jar of whipped butter introduces water and potentially microbes, dramatically shortening shelf life. Unless a formula is specifically developed as an emulsion with a suitable preservative system, keeping oil-based and water-based products in separate containers is the safest approach for external use.
Will whipped shea butter clog my pores?
Pore-clogging potential varies by person and by where the product is used on the body. Many people tolerate shea well on limbs, hands, and hair but find it too heavy for facial use-especially on oily or acne-prone areas. Lip balms and targeted spot treatments on the face may work fine, but full-face application is risky for breakout-prone skin types.
If you want to try whipped shea on your face, patch test on a small area of the jawline for a week before applying to larger zones. Adjust frequency if any congestion appears. For facial hydration on oily skin, lighter options-like a hydrating mist or aloe vera oil blend-may be a better fit.
How do I know if my whipped shea butter has gone bad?
Natural butters usually spoil by oxidation rather than mold, since there is no water in the formula to support microbial growth. Signs of spoilage include:
-
A sharp, crayon-like, or sour smell distinctly different from shea's natural nutty aroma
-
Noticeable darkening or blotchy discoloration that is not explained by temperature
-
A sticky, unusually tacky surface feel
If any of these signs appear, discard the product. To minimize waste, make small batches more frequently if you don't use body butters quickly. A well-stored jar with vitamin E and quality oils should maintain its performance for at least a year-but trust your nose and eyes over any calendar date.


